Entries by Mat Marrash (76)

Tuesday
Feb082011

The 52 Project, Week 25: PDN PPE in NYC with the FPP!

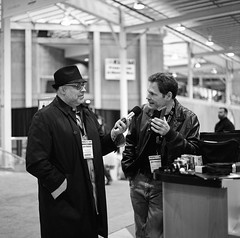
Duane explaining the Hasselblad NPC Polaroid back.


The acronyms, make them stop! >__<

Seriously now, this first week of my little trip out east was pretty freaking awesome. There were a lot of photos taken, and whole hell of a lot to scan; most of which are still being scanned, by the way. So all the following weeks you’re about to see will be completely in order of awesome and in no sense of chronological order. Enjoy.
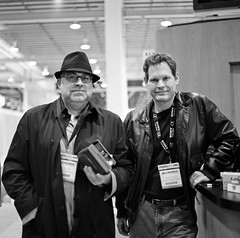


FPP Hosts Mike Raso & Duane Polcou

First up is the main reason I made this trip, to go meet the makers of the Film Photography Podcast at Photo Distric News’ Photo Plus Expo 2010 in New York City. (see why I used the acronyms? :P) Before, during, and after my interview with them, I managed to snag some shots of Mike Raso (left) and Duane Polcou (right) at the registration/interview booth outside of the madness of the PPE showroom. Overall, the interview went very well, Mike and Duane were awesome guys who were as, if not more, enthusiastic about film than me. While I was snagging pictures of them, Mike was snagging pictures of me and the whole kit, with a Kodak Pocket Instamatic 110 camera and some Impossible PX 600 black and white.

With FPP’s more recent interest in large format, I’ll have to pay them a visit and let them play around with the 8x10. Good times for sure. ^__^
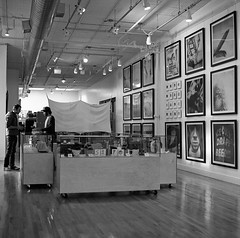

Impossible Project Space, NYCLater that same afternoon, I made the huge mistake of walking almost four miles from the Jacob Javits Expo Center all the way to the Impossible Project NYC Space. Thankfully, the long haul was worth it! All the way up on the fourth floor of this building, rested one of the last frontiers for instant film in the world! If you haven’t heard of The Impossible Project or tried out their awesome films, be sure to check them out.

Something Good: The scans are pretty clean, with a long tonal scale and chock-full of midtones. TMAX 400 in XTOL 1:1 never seems to go wrong.
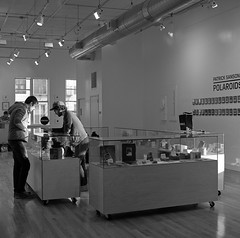

Btw, the Pat Sansone show was also awesome!Something Bad: The light in the Javits Center was a tad low for ISO 400, but opening up the aperture and lowering my shutter speed to dangerous handheld levels, 1/15 and 1/30th were necessary for the final image.

Something Learned: The best way to meet new people in photography is to get out there and shoot. And when you’re sick of shooting, go on the internet and put yourself out there some more. Chances are you’ll run into cool guys like the FPP; heck, you might even score some new gear or film!

Next Week: More medium format scans from the trip, still trying to nail down these 8x10’s. >__<
Tuesday
Feb012011

The 52 Project, Week 24: Ned

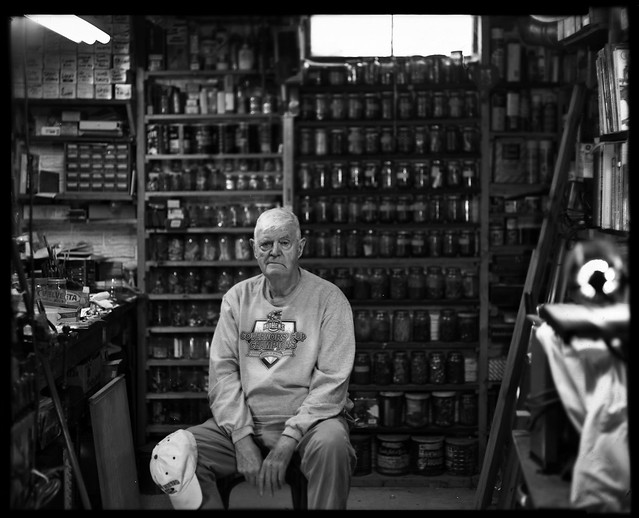
Today’s image means a lot of things to me, and I hope it shows. ^__^

Despite the creative mess down there, somehow knows where everything is... 0__0

Meet John Edward Lenhart, affectionately known by everyone else as Ned, my grandfather. Born to a large family in the middle of The Great Depression, Ned’s lived through a lot of ups and downs. Recent years especially haven’t been kind to him. He’s had to tackle a stroke, learning to walk again, losing most of his left lung to cancer, and continuing a silent battle with skin cancer. But as you can see in front of you, not much gets in the way of him doing the things he loves, namely woodworking and baseball.

Since I’ve already captured his baseball loving side HERE, I thought I’d address his other love, in the heart of his basement workshop. Space was tight and light was terribly dim, but I did the best with what I was given, here are the details.

Early one Saturday afternoon at my grandparents’ house, I started to feel the urge to take a picture with the 8x10. And this day, it would be a special one, the day I would finally cave and take a proper portrait. So, as soon as my grandparents were down and out for their afternoon naps, I sprang into action. Grabbing the mass of equipment from the car, I rushed it down to Ned’s basement workshop to set up the entire shot, “Just add Ned”.

Framing up the shot was a little tight with a 50mm lens equivalent in space about the width and length of a college dorm, but I made the best of what time and space I had. Knowing my limitations, the shot was setup expecting about a half length, seated portrait. While focusing and metering the entire scene, I noted a difference in highlight to shadow values of approximately 18 stops! For you non-Zone System users out there, a normal scene has 6-7 stops difference. To say this was a high contrast scene was a gross understatement. Worse news, even wide open (a whopping f/9 on my lens), the Zone II/III shadows in my image were reading 30 seconds. I needed some major light here, and fast.

Luckily for me, I was in a workshop, home to some of the most cost-effective light sources known to man. Two shop lights and a flood-lamp flashlight later, I’ve got my key lights set up and aimed towards the chair that Ned would be sitting in. My exposure now is about 8-10 seconds on Zone V, meaning I needed to underexpose that two stops to Zone III, but then compensate for my bellows draw and movements. Let’s say 4.5 seconds (I did :p). Down came Ned, got set up, and we took the above shot.

Not too shabby eh?

Something Good: For a long exposure, Ned’s looking pretty sharp, and nicely isolated from the surrounding workshop clutter.

Something Bad: The negative itself is a little thin, even for having soooooo much dynamic range. It could have handled another minute or two sloshing in the tray. Live and learn.

Something Learned: Give your subject no excuses to get out of the picture, aka having it all ready for them, and they’ll usually agree to the portrait. On the technical side of things, I learned having a wide SBR, subject brightness range, can be tricky when printing on silver papers; more on that sore subject in later weeks.

Next Week: The 8x10 hits the road on a two week end-of-fall vacation, who knows where it’ll end up!

Saturday
Jan152011

The Importance of Tagging

Alright, so you've got a camera, you're taking nice pictures, and now you'd like to have the rest of the world have a look at your work. What now?

As of January 2011, the image sharing options are nearly endless. You've got: Flickr, Picasa, Photobucket, Facebook, Tumblr, Instagram, The Best Camera, SmugMug, Windows Live, Imgur, and MANY, MANY more. Just checkout Wikipedia's List of Photosharing Websites for more information and links. 

Joining any number of these sites is a great first step, but it doesn't necessarily guarantee that folks are going to look at your images. Remember, there's millions of other people out there doing the exact same thing, trying to stick out. 

How to Make Your Images Stick Out (in a search): 

Create a unique image name - DSC_12345.jpg is NOT a unique title. If it's a picture of a couple who were just engaged, try something like "John and Mary Engagement". Pretty much anything but the default title gives a better search hit chance.

Add a comment - whenever given the opportunity to give more description to an image, take it! Don't just say what the photo is, give it a quick back story, and if applicable, give a little exposure data. 

Most importantly, TAG! - Whether its keywording the images in Photoshop Lightroom or adding tags on Flickr, make sure your image has tags that describe its entirety. 

And just so you're not left with a vague description on tagging, here's a little more info on tags: 

Tags are simple  - think of key words that when used separately can describe your image. A picture of a golden retriever puppy holding a bone could be tagged as simply as "dog" "bone".

Specific, but not too much - lets use the golden puppy as our example again. "golden retriever" and "puppy" could be used as additional tags, further describing your image. But "golden retriever holding bone" is too specific. People are more likely to search without the use of quotes, so separate words are searched as such. 

It only takes a minute - honestly, tagging is as simple as typing a few quick sentences. If you can manage to squeeze an extra couple of hours of playing Farmville at work, I'm sure you can spend the necessary ten seconds to add image tags. 

So now that you're all tagged, your images are instantly going to be a hit, right? Probably not, sorry. It takes a long time, and lot of social networking to get your images out there. Tagging is just another small part of the greater process of exposure. But if you're tagged, you're much better off being found in a search than just another image in a sea of Scan_01.tif and IMG_546.jpg. 

Don't believe in the power of tagging? Try image searching "adorable corgi findlay" and see what comes up. ^__^