X-Ray Film, Not Just for Shattered Ulnas Anymore!
 Above: The aforementioned Ulna 0__0 If you thought X-Ray film was just for this kind of stuff, keep reading, you may be surprised!
A couple of weeks ago, I posted about the crazy notion that I would start shooting with X-Ray film. Yes, that's right, the same stuff that enabled you to look at your first broken bone can be loaded and shot onto just like any other B&W film. Pretty cool, huh? Well let's take a look at some of the other things that makes X-Ray film it's own unique shooting experience:
- The Cost - This stuff costs ~ $0.33/sheet in 8x10 after taxes and shipping. Compare that to a premium B&W emulsion such as Kodak TMax 400 at ~ $8/sheet or Ilford HP5+ (my goto film) at ~$4/sheet.
- The Look - X-Ray film comes in two basic flavors, blue sensitive and green (with some blue) sensitive. Blue sensitive reacts to light similarly to very early B&W films in the look of the final image, while the green sensitive film has a very nostalgic orthochromatic film look (think 1920's B&W).
- The Feel - Since neither kinds of x-ray film are sensitive to red light, you can load, unload, and even process this film under a red safelight! It almost feels like cheating, coming from spending hours in complete darkness shuffling around film in trays.
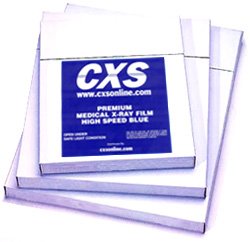 The best resource for X-Ray film! (click image
So why isn't every photographer out there shooting this super-cheap "wonder film"? Well, that's because it has it's own set of equally unique flaws that make it more of a specialty film more than an all-purpose film like today's emulsions. For starters it's a little finicky to process, having light sensitive emulsion on not one, but both sides! This means that if you're used to developing sheet film in trays in stacks of 4-10 sheets, forget about it. Processing x-ray film like that would give you more scratches on the film than if you let your cat try and process your regular film by hand.
To add another layer of complexity to this persnickety film, you have keep in mind the color of objects in the picture before photographing it.
 My first image shot on X-Ray film
Let's say you're shooting a still life of a green apple and a red apple with green sensitive film. To a standard B&W emulsion, the apples would both appear as middle grey tones, the green apple being just a hair lighter than the red. On green sensitive x-ray film, however, the green apple would be a very light grey tone, with the red apple going a very intense dark grey, almost black. Red, being the compliment of green, will barely be recorded by green sensitive film while green light itself will be recorded even lighter than if using a modern/panchromatic film. The best way I've found to counter this color-visualization problem is to quickly "flick" a green colored filter in front of one eye to see how the light is captured. Why do you have to "flick" the filter? Human eyes are crazy adaptive to changing light situations, and it's very easy to fool our eyes into seeing tones that won't really be as light/dark as we perceive them after adapting to a colored filter.
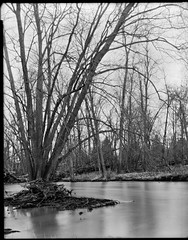 Shot @ ASA 100 w/ Yellow filtOnce the two issues above have been worked out, there's still the issue of film speed and development to handle! Since there's no real base-line ASA listed for x-ray films, it's anybodies guess as to how to shoot them, let alone process them. The popular opinion of the moment favors two very distinct shooting styles with this film. One camp shoots the film for traditional silver printing and scanning by shooting the film at a low ASA of 50-64, then stripping one of the sides of emulsion, ala Fuji FP-100c negative reclaiming. The other camp shoots the film at a slightly higher ASA 100-200, and keeps both sides of the emulsion intact, to keep that larger negative density for alternative photographic processes such as carbon, platinum/palladium, albumen, and more. My first image (above), was shot at ASA 50, and came out way, WAY too dense to do much of anything with on silver gelatin papers. Considering just how overly dense it was, carbon printing and more contrast-needy alternative processes may be the only way to print those kinds of negatives. Personally, I've found shooting somewhere between ASA 100-200 gives me acceptable prints with silver, and ample density for carbon printing. And with the addition of a yellow filter (see image right), even more contrast can be controlled, and a little darkening of the sky can be obtaining with this naturally contrasty x-ray film. That's all the work done in-camera, now to bring it all together in the darkroom.
The final step in taming x-ray film involves very careful handling and processing. Two sides to the emulsion means 100% more chances for scratches on the film, both when dry loading the film, and when wet processing. It helps being able to do all of this under a red safelight, but still exercise caution with this film. I always wear gloves loading, unloading, and processing, to make sure I don't cover the film with fingerprints that'll show up in the final print. Next comes the issues of scratch-free development. There are three main approaches to doing this: processing one sheet at a time in flat bottomed trays, processing one sheet at a time in ziplock bags, and processing with stainless steel film hangers. At the moment, until I've got the rest of my 8x10 hanger kit assembled, I'm stuck tray processing one sheet at a time. In order to save chemistry, I've been using 1L of Pyrocat HD, 2:2:100 for a run of four sheets. Highly dilute, compensating developers are recommended for x-ray film, as it is very contrasty in nature, but I've seen acceptable results obtained from D-76, to Rodinal, all the way to standard x-ray developer. The other bonus to using a staining and tanning developer such as Pyrocat HD, is that it hardens the emulsion throughout processing, reducing the chances for scratching during stop, fixer, and washing.
That's about all I have to offer on x-ray film at the moment. If you haven't tried some of this very unique, affordable film, trying 100 sheets of it in 8x10 costs less than a tank of gasoline, and gives you a lot of room for experimentation. If you'd like to know more about shooting with x-ray film, or would like to see some more examples, please visit the two links below: (also consider registering with the Large Format Photography Forum)
X-Ray Film Examples and Comparisons
Thanks for stopping by, and long live film!
 Mat Marrash
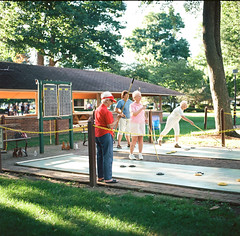


