Entries in 52 Project (37)

Tuesday
Mar292011

The 52 Project, Week 32: Hasselroids & Polablads

Pro tip: get a GOOD used Polaroid back.

 As little as 8-10 years ago, when you were going to take a picture that needed to be absolutely, positively, sharp and well exposed, you couldn't look at the back of your camera (also known as "chimping"), you needed to take a Polaroid. Not the boxy, point and shoot style, integral film eating Polaroid 600 that we all know and love, but one made to take pack film (click the link for more info). On my Hasselblad, taking a test exposure is as simple as attaching the film back, taking the picture, and pulling out the instant film tabs. If you've never taken an instant picture with pack films before, I highly reccomend getting an old Polaroid Land Camera or Polaroid back and trying it. It's a thrill to peel apart the positive from the negative, held together by a thin layer of gooey, unused reagent (dont' eat this please). This is infinitely more fun than looking at the back of some glare-ridden LCD screen.

Save the model of camera used, this video perfectly illustrates the process of using pack film in a Polaroid back to proof your exposure:

Now, some of you that follow the news may be wondering, "where the heck can I get Polaroid film? Didn't they stop making film?"

The truth of the matter is yes, Polaroid no longer makes their signature product, Polaroid 100 series pack films. Thankfully, the guys over at Fujifilm in Japan have come up with their own phenomenal pack films, Fuji FP-100C and FP-3000B. The 100 speed is lower speed, vivid color film, and the 3000 is an incredibly fast B&W film. Each are great under a variety of condtions, and include self-terminating development. You can literally shoot all day, and peel your film when you get home.

 Considering the quick nature of instant photography, lessons can be learned quickly and to little cost to the user, leaving little for me to discuss in the typical good, bad, and ugly format. Instead, we'll talk about some things that can go wrong with your instant film, with examples from yours truly.

Lesson 1: Light Leaks - never, ever open up your pack of film after it has been loaded


Lesson 2: Overexposing is the Devil! - instant film responds to overexposure much like slide film and digital, by crying, blowing out highlights, and fogging your positive. >__<


Lesson 3: Don't Expect Expired Film to Perform - if it's more than 4 years old and hasn't been cold-stored, consider any kind of image a miracle. The images below are Polaroid 669 film from 1992!

Reagent is a liquid, it can dry up and do this.The background is more yellow than black.


Sometimes you get really lucky. ^__^


And that pretty much does it for this week. Instant photography is fun stuff, and the only way it'll keep being made is if somebody is out there to shoot it. So pick up that Polaroid Land Camera or Polaroid back today and get shooting!


Next Week: More fun times with the Hasselblad.

Friday
Mar182011

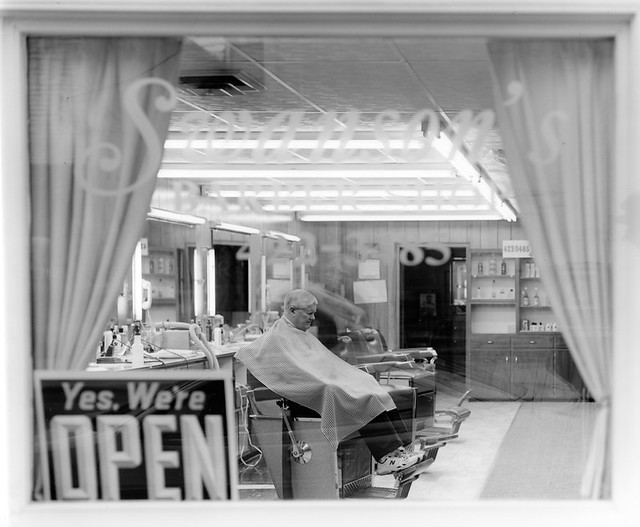
The 52 Project, Week 31: Swanson's on Sandusky Street

What started as a quick practice in large format camera setup has suddenly become my most successful 8x10 B&W to date. 0__0 Here's the low-down.

It was about two weeks after my trip to New York, I was bored, starting to feel the winter weather creeping in, and really starting to miss shooting that big 'ole 8x10. There were still many prints to be made, as I was in the early test stages of fine-tuning my Pyrocat HD developing regimen; aka, the initial contact prints looked horrid. For those of you that follow the blog regularly, you can take this post as the big excuse why my posts started to backup throughout December.

So anyway, I had these god-awful contact prints on the cheapest fiber paper known to man, made under darkroom conditions unbeknownst to cause horrendous post exposure fogging ("Doh!"). I was taking them to my good friend Leslie over at Findlay's only photo-related shop, Imagine That! for some peer review. What I love about Leslie is that she's too nice a person to tell a bad photo off, unless you ask her for her honest opinion. Of course, I did just that and got the earful that was needed; my consolation prize was getting to pet with the "shop cat" Schmoop, a monstrous rag doll cat with enough fur to take out an army of allergic soldiers.  With my now low-hanging self-esteem, I sulked back to the car, when I happened to notice Leslie's next door neighboring business for the first time. It was a quaint little '50's style barber shop with a simple everyday scene occurring. I was so struck, I went in to ask Mr. Swanson's permission for a picture while he finished up yet another haircut. There was very little time for the setup and capture to occur before this haircut was over, and daylight was fading fast. This was the perfect opportunity to capture something meaningful with the 8x10.

And here's what I got:

It's great slices of Americana like this that give me hope for the continuance of Mom & Pop shops in the future. ^__^The exposure was quite a long one, 5-6 seconds, with a LOT of faith placed on the busy barber and his patient patron. I needed as much light hitting the film as I could possibly get, so a lot of swing was used to manipulate my depth of field while keeping the lens close to wide open. Only after processing the film did I realize there was MORE than enough light captured, I had in fact created the most dense Pyrocat negative I'd ever seen. >__< Just to get the "crappy" print on RC paper needed a low f-stop and a lot of Grade 0 time on the enlarger. Translation: I ignored protocol and consistency of calibration in order to get a cool shot, much paper would be wasted in obtaining a good print.

All in all, the severely diluted Pyrocat HD came through for me in preserving the highlight detail in the fluorescent bulbs while pulling out plenty of shadow detail towards the back room of the barber shop. No complaints in the image department, except maybe the overall framing (or frame within a framing :p).

When I started printing bigger, 20x24 fiber prints to be exact, you can bet multiple, multiple copies of this print were made. They're all pretty close to one another, with some softer in contrast than others. Dodging and burning gets a little trickier when dealing with split-grade printing; more about that insane process another day. So far, the prints have been doing incredibly well. It's three for three thus far, getting into:

So what was learned from this image?

Something Good: It appears to have an impact favorable to a majority of viewing audiences. Perhaps its the simplicity of the image, or the familiarity of the subject matter. Either way, it's doing quite well in the aesthetics department.

Something Bad: This neg is dense, like 5+ minute print times dense. I'm terrified to use reducer as I've heard horror stories about what it can do to pyro stain. The flip side is this makes a fabulous negative for Platinum/Palladium printing should I ever have enough disposable income to start "printing money".

Something Learned: Judging from the very few images I've taken which include other people, I'm starting to tell that I like environmental portraiture, a lot. Not that head-on portraits without context are a bad thing, I just feel they're a waste of the detail capturing power of 8x10.

Next Week: We're going back down to medium format, for some off-beat fun shots. Don't wanna get too serious for a personal blog. :p

Monday
Mar142011

The 52 Project, Week 30: All About Amherst

The large format adventures continue with more from my trip to Amherst, MA to visit my good and long-time friend Katie O'Neil. During the very brief visit, we had quite a few adventures, including but not limited to: (you can pm me for the entire scoop)

  • Painting horses
  • Bailing someone out of prison
  • Visiting an insane asylum
  • Meet Dr. Suess' nephew
  • Losing cell phones and Polaroids deep in the woods

Fun times indeed. Now here are some scans:


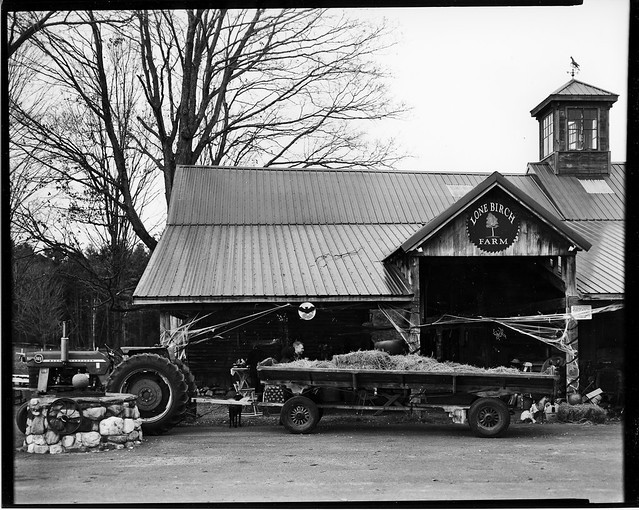
Preceding the Halloween party on the Lone Birch Farm, this is my failed attempt at a group shot. Note the lack of people. >__<

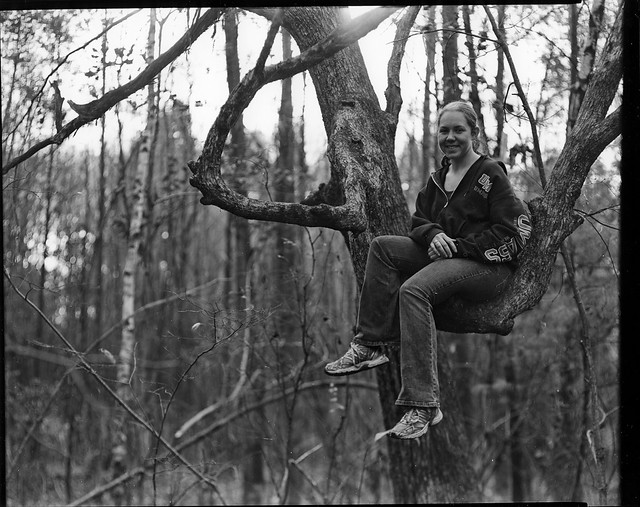
This is Katie O'Neil. She loves horses, Ireland, good movies, and climbing trees. The first three are hard to photograph, so here she is.

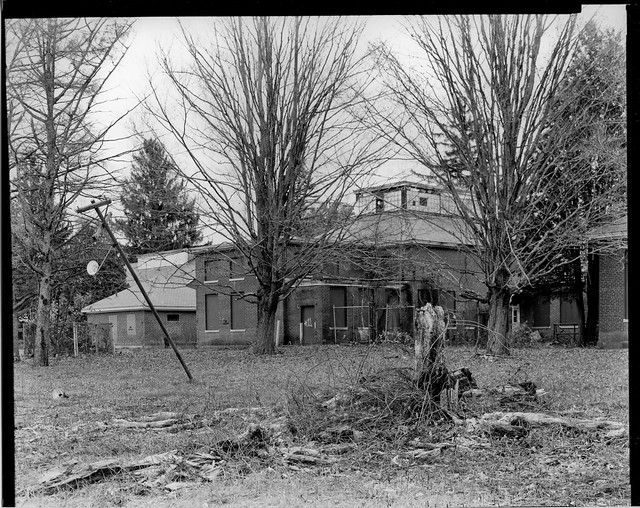
Ah urban decay, you photograph on large format so nicely. Well, at least when there's a contrasty scene; here, not so much. >__<

 Just covering the bases again here, all of the above were VERY quick contact prints made onto Oriental RC VC paper, developed in generic Dektol replacement for 1:00 min. The prints were then scanned onto a trusty Epson V700 with some level tweaking in post.

Now a for this week's closing words.

Something Good: For my third overall batch of Pyrocat HD negatives, these guys all came out equally dense. Print times were all within 5 seconds of each other. When printing from a 20x24 equivalent height (for consistency's sake), that's actually pretty close.

Something Bad: These images as negatives were all equally over-processed. When over-processed negatives come out of a staining developer, the overall film base (usually clear) becomes stained/tanned itself. Not necessarily a bad thing, this side effect can be corrected by either reducing overall density in farmer's reducer or by printing longer...way longer. >__>

Something Learned: The more dense a Pyrocat stained negative becomes, the more filtration it will need to obtain proper contrast on VC papers. Remember, brownish-stain acts like a yellow SUPER-low contrast filter to VC paper, so this must be countered with yellow's compliment, purple light.

Next Week: Back to only one image, but a big one, with a great story and some great impact.