Entries in 8x10 (16)

Tuesday
Feb012011

The 52 Project, Week 24: Ned

Today’s image means a lot of things to me, and I hope it shows. ^__^
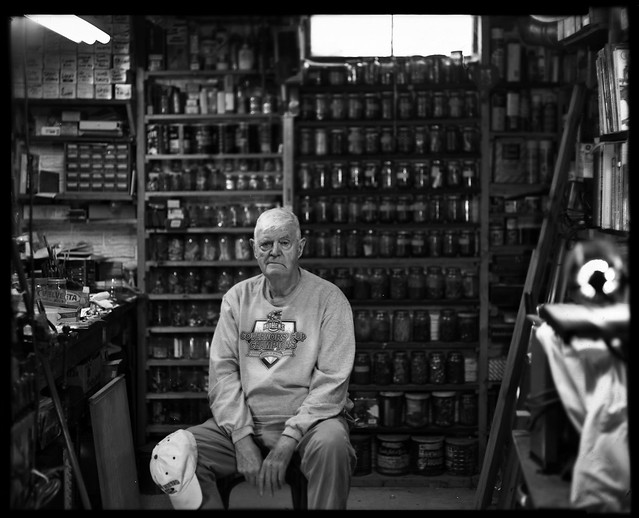
Despite the creative mess down there, somehow knows where everything is... 0__0

Meet John Edward Lenhart, affectionately known by everyone else as Ned, my grandfather. Born to a large family in the middle of The Great Depression, Ned’s lived through a lot of ups and downs. Recent years especially haven’t been kind to him. He’s had to tackle a stroke, learning to walk again, losing most of his left lung to cancer, and continuing a silent battle with skin cancer. But as you can see in front of you, not much gets in the way of him doing the things he loves, namely woodworking and baseball.

Since I’ve already captured his baseball loving side HERE, I thought I’d address his other love, in the heart of his basement workshop. Space was tight and light was terribly dim, but I did the best with what I was given, here are the details.

Early one Saturday afternoon at my grandparents’ house, I started to feel the urge to take a picture with the 8x10. And this day, it would be a special one, the day I would finally cave and take a proper portrait. So, as soon as my grandparents were down and out for their afternoon naps, I sprang into action. Grabbing the mass of equipment from the car, I rushed it down to Ned’s basement workshop to set up the entire shot, “Just add Ned”.

Framing up the shot was a little tight with a 50mm lens equivalent in space about the width and length of a college dorm, but I made the best of what time and space I had. Knowing my limitations, the shot was setup expecting about a half length, seated portrait. While focusing and metering the entire scene, I noted a difference in highlight to shadow values of approximately 18 stops! For you non-Zone System users out there, a normal scene has 6-7 stops difference. To say this was a high contrast scene was a gross understatement. Worse news, even wide open (a whopping f/9 on my lens), the Zone II/III shadows in my image were reading 30 seconds. I needed some major light here, and fast.

Luckily for me, I was in a workshop, home to some of the most cost-effective light sources known to man. Two shop lights and a flood-lamp flashlight later, I’ve got my key lights set up and aimed towards the chair that Ned would be sitting in. My exposure now is about 8-10 seconds on Zone V, meaning I needed to underexpose that two stops to Zone III, but then compensate for my bellows draw and movements. Let’s say 4.5 seconds (I did :p). Down came Ned, got set up, and we took the above shot.

Not too shabby eh?

Something Good: For a long exposure, Ned’s looking pretty sharp, and nicely isolated from the surrounding workshop clutter.

Something Bad: The negative itself is a little thin, even for having soooooo much dynamic range. It could have handled another minute or two sloshing in the tray. Live and learn.

Something Learned: Give your subject no excuses to get out of the picture, aka having it all ready for them, and they’ll usually agree to the portrait. On the technical side of things, I learned having a wide SBR, subject brightness range, can be tricky when printing on silver papers; more on that sore subject in later weeks.

Next Week: The 8x10 hits the road on a two week end-of-fall vacation, who knows where it’ll end up!
Thursday
Jan132011

The 52 Project, Week 23: I Think There's a Pattern Here

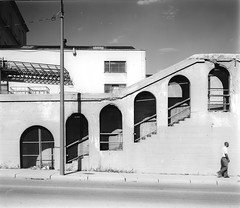
On yet another seemingly boring Sunday afternoon, which may after today be called “8x10 Day”, I took to the streets of Toledo, OH looking for an image. Not feeling adventurous enough to go all the way downtown, I started at the Toledo Museum of Art and started working my way east, in hopes of an interesting image. Having the same kind of photo on my mind as taken in Week 20, I knew this kind of image might take a while to find; two hours to be exact.


I still need to work on scanning these contact prints.

Finding the patterned building leading against the sloped street was the easy part, filling it with somebody was much harder. Quite hard to tell in the photo, but I was on the opposite side of a four lane, very busy highway. So even when someone/a group of someones were coming into the scene, that doesn’t mean a semi, school bus, or sedan wasn’t. >__>

After about an hour and a half of queer looks, honked horns, and explaining this camera outfit to passers by, I was done; something needed to happen quick. Just then, a small pickup truck pulls off the road, nearly up onto the sidewalk, which would have simultaneously ended my loaner 8x10 and this project. Turns out, it was the owner of the building that the Eastman Commercial had been staring at for nearly two hours.

“Oh crap, here we go,” I thought.

Judging by the manner with which he pulled in front of the shot, I wasn’t expecting anything pleasant. Fortunately for my optimistically paranoid self, he was a fan of all things antique, AND willing to “pose” for shot with his building. He pulled away, only to come walking back into my shot 15 minutes later.

That brings us to this week’s key issues.

Is this image too much like Week 20’s?
Is the feeling of the image compromised by the fact that the person was encouraged to participate? Is it still Street Photography?

Why are there no answers here? Much like anything else art, the answers to these questions are entirely subjective. But that doesn’t mean you out there can’t weigh in. I’d welcome your open and honest opinion, as comments and critique only serve to help the artist. Thanks for playing along.

Something Good: Having well over an hour to meter the shot, compose, recompose, etc., etc., the shot and its processing were more than controlled, even with a red filter on a directly sun-lit scene.

Something Bad: Aside from the drama llama that comes riding in from the aforementioned issues, there’s some obvious dust spotting on the negative itself. This is the result of a dust being trapped on the darkslide and migrating to the unexposed sheet prior to exposure. Drats. >__<

Something Learned:
There’s really nothing quick about the large format process, and I think I’m really starting to like it.

Next Week: A deliberate and very personal portrait.

Wednesday
Jan122011

The 52 Project, Week 22: Sunday, Sunday, Sunday at the Motocross

Processing last week’s negative late one Friday afternoon, I found myself anxious to shoot even more of this large format stuff. Within minutes of this hankering, my LF sponsor/mentor/camera donor Spencer came up to the lab to extend an invitation my way. He was going to take his freshman digital photography class out to Delta, OH to cover an all-day motocross event. Not seeing how I could possibly do sports photography with an 8x10, I accepted the invite, seeing it as a personal challenge.

Long story short, this motocross and all the people there were very cool. Though many folks looked at me as though crabs were crawling out my eyes, I was allowed access to all of the course, getting me really close to the action. One question remains, however...

How does one capture high speed action with a view camera?

Just like they did it back in the early 20th century, of course. ^__^

Step 1: Pick a good vantage point capable of producing interesting subject matter.
Step 2: Pre-focus the image, utilizing rise, fall, swings, and tilts to maximize depth of field.
Step 3: Meter, meter, meter some more. Focus again, stop down your lens, and meter again.
Step 4: Close your lens, insert your film holder, remove darkslide, covering back of the camera to insure against light leaks.
Step 5: Wait for the action to come to you. Plunge down the shutter release a split-second before the intended composition falls into place.
Click image for more exact exposure information.
Voila! Now all you have to do is not screw up any of your processing. Though easier than it sounds, I took 5 shots that day, and here’s the best/least screwed up of them all:


Something Good: The shot definitely has adequate action, composition, and depth of field.

Something Bad: The subjects are a little dark, but this was a trade-off for overall tonality of the image (deep blacks, lots of middle greys, bright whites). This was likely a result of using a Red filter (-2.5 stops of light) and only compensating 1-1.5 stops due to shutter speed limitations (max of 1/150 sec.)

Something Learned: With a lot of patience and practice, we’re talking a 6 hour day of trial and error, you can shoot anything with a view camera. And just like any kind of woodworking, measure twice (at least), and cut once (take the shot).

Next Week: Finding comfort in repeatable subject matter, a good thing or getting lazy?